Perfect choice! Classic Cherry Delight is a timeless no-bake dessert that layers a buttery graham cracker crust, a creamy cheesecake-like filling, and sweet cherry pie topping. It’s nostalgic, simple, and always a hit at gatherings. Below is a long, detailed recipe with tips, variations, and serving suggestions so you can make it like a pro.
Classic Cherry Delight Recipe
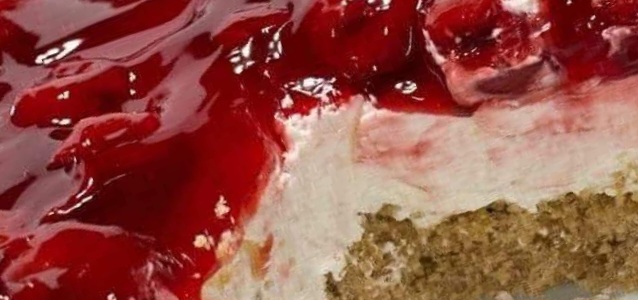
Cherry Delight first gained popularity in the 1960s as an easy, crowd-pleasing dessert for potlucks, holidays, and Sunday dinners. Its beauty lies in its simplicity — minimal baking (or none at all), rich flavors, and that beautiful red cherry topping that makes it look festive and irresistible.
Ingredients (Serves 12–15)
For the Crust:
- 2 ½ cups graham cracker crumbs (about 20 full crackers, finely crushed)
- ½ cup unsalted butter – melted
- ¼ cup granulated sugar
For the Filling:
- 8 oz cream cheese – softened to room temperature
- 1 cup powdered sugar – sifted
- 1 teaspoon pure vanilla extract
- 1 container (8 oz) whipped topping (like Cool Whip), thawed
For the Topping:
- 1 can (21 oz) cherry pie filling (classic choice, but homemade works too)
Step-by-Step Instructions
1. Make the Crust
- In a mixing bowl, combine graham cracker crumbs, melted butter, and sugar.
- Stir until the crumbs are evenly coated and resemble wet sand.
- Press the mixture firmly into the bottom of a 9×13-inch baking dish. Use the back of a spoon or the bottom of a glass to pack it tightly — this ensures the crust holds together.
- Place in the refrigerator to chill while preparing the filling (at least 20 minutes).
2. Prepare the Creamy Filling
- In a large mixing bowl, beat cream cheese with an electric mixer until smooth and fluffy.
- Add powdered sugar and vanilla, mixing until fully incorporated and creamy.
- Gently fold in whipped topping until smooth and airy, being careful not to deflate it.
3. Assemble the Layers
- Spread the cream cheese mixture evenly over the chilled graham cracker crust.
- Smooth the top with a spatula for an even surface.
- Spoon cherry pie filling over the creamy layer, spreading it gently so the filling covers the entire surface.
4. Chill and Set
- Cover the dish with plastic wrap or foil and refrigerate for at least 4 hours (overnight is best). This helps the crust firm up and flavors meld beautifully.
5. Serve
- Cut into squares with a sharp knife.
- For a cleaner cut, wipe the knife between slices.
- Garnish with a dollop of whipped cream or a sprig of mint if desired.
Serving Suggestions
- Perfect for holiday gatherings, church socials, or summer BBQs.
- Serve chilled straight from the fridge.
- Pair with coffee, tea, or a cold glass of milk for a comforting treat.
Recipe Tips & Variations
- Homemade Cherry Topping: Simmer 2 cups fresh or frozen cherries with ½ cup sugar, 2 tablespoons cornstarch, and ½ cup water until thickened. Cool before topping.
- No-Bake Option: If you want zero oven use, simply refrigerate the crust instead of baking it.
- Extra Creamy: Add ½ cup sour cream to the filling for a tangier, richer flavor.
- Different Fruit Toppings: Swap cherry pie filling with blueberry, strawberry, raspberry, or even apple pie filling.
- Individual Servings: Make in clear cups or mason jars for a portable, party-friendly dessert.
- Crunchy Upgrade: Add chopped pecans or walnuts to the graham cracker crust for a nutty twist.
Storage & Make-Ahead
- Refrigerator: Keeps well up to 5 days covered in the fridge.
- Freezer: Can be frozen (without cherry topping) for up to 2 months. Thaw overnight in the fridge, then add topping before serving.
- Make-Ahead: This dessert actually tastes better when made a day in advance, as the flavors have time to meld.
 Classic Cherry Delight is easy, elegant, and nostalgic. It’s one of those desserts that never goes out of style, and every bite is creamy, sweet, and slightly tangy with that pop of cherry flavor.
Enjoy.