Why You’ll Love This Recipe
There’s so much to adore about Easy Garlic Cheese Bombs. Here’s why they’re a must-try:
- Cheesy Goodness : Each bite is packed with melty, gooey cheese that oozes out as you pull them apart.
- Garlic Butter Bliss : The garlicky butter coating adds an irresistible aroma and flavor that pairs perfectly with the cheese.
- Quick and Easy : Ready in under 30 minutes, this recipe is perfect for busy nights or last-minute gatherings.
- Customizable : Add herbs, spices, or different cheeses to tailor them to your taste.
- Crowd-Pleasing : Whether you’re feeding kids, adults, or guests, everyone will love these cheesy bites.
Ingredients You’ll Need
The secret to these cheese bombs lies in their simple yet indulgent ingredients. Here’s what you’ll need:
For the Cheese Bombs:
- 1 tube refrigerated biscuit dough (e.g., Pillsbury Grands)
- 1 cup shredded mozzarella cheese (or your favorite melting cheese like cheddar, Monterey Jack, or pepper jack)
- 1/4 cup grated Parmesan cheese (optional, for extra flavor)
For the Garlic Butter Coating:
- 1/2 cup unsalted butter (melted)
- 2 cloves garlic (minced)
- 1 teaspoon garlic powder
- 1 tablespoon fresh parsley (chopped, plus extra for garnish)
Optional Add-Ins:
- Red pepper flakes (for a spicy kick)
- Italian seasoning (for extra flavor)
- Bacon bits (for a smoky twist)
Step-by-Step Instructions
Ready to whip up these cheesy, garlicky delights? Follow these easy steps:
Step 1: Preheat Your Oven
Preheat your oven to 375°F (190°C) . Line a baking sheet with parchment paper or lightly grease it for easy cleanup.
Step 2: Prepare the Dough
Open the tube of biscuit dough and separate the biscuits. Flatten each biscuit into a circle using your hands or a rolling pin. Place a generous spoonful of shredded cheese (and optional Parmesan) in the center of each flattened biscuit.
Step 3: Seal the Bombs
Gather the edges of the dough around the cheese and pinch tightly to seal. Roll the filled dough into a smooth ball between your palms to ensure no cheese leaks out during baking.
Step 4: Bake the Bombs
Place the sealed cheese bombs on the prepared baking sheet, spacing them about 1–2 inches apart. Bake for 12–15 minutes , or until golden brown and puffed up.
Step 5: Make the Garlic Butter
While the cheese bombs bake, prepare the garlic butter. In a small bowl, mix together the melted butter, minced garlic, garlic powder, chopped parsley, and any optional add-ins like red pepper flakes or Italian seasoning.
Step 6: Coat the Bombs
As soon as the cheese bombs come out of the oven, brush them generously with the garlic butter mixture. Sprinkle with additional chopped parsley for a pop of color and freshness.
Step 7: Serve and Enjoy
Serve the cheese bombs warm while the cheese is still gooey and melty. Pair with marinara sauce, ranch dressing, or hot sauce for dipping if desired.
Why This Recipe Works So Well
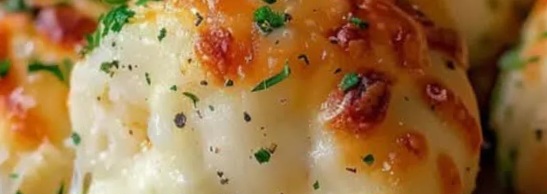
The magic of these Garlic Cheese Bombs lies in their simplicity and bold flavors. The buttery biscuit dough provides a soft, fluffy exterior, while the gooey cheese filling creates an indulgent surprise in every bite. The garlicky butter coating ties everything together with its rich, aromatic finish. Together, these elements create a snack that’s as comforting as it is addictive.
Variations to Try
While the classic version is divine, here are some creative ways to switch things up:
- Pepperoni Pizza Bombs : Add a slice of pepperoni inside each bomb for a pizza-inspired twist.
- Spicy Kick : Use pepper jack cheese or sprinkle red pepper flakes on top for a fiery flavor.
- Herb Infusion : Add fresh basil, oregano, or thyme to the garlic butter for an aromatic touch.
- Gluten-Free Option : Use gluten-free biscuit dough to make this recipe suitable for dietary restrictions.
- Mini Bombs : Cut each biscuit into quarters for bite-sized cheese bombs perfect for parties.
Tips for Success
- Seal Tightly : Ensure the dough is well-sealed around the cheese to prevent leaking during baking.
- Use Fresh Garlic : Fresh garlic provides a more vibrant flavor compared to powdered garlic alone.
- Brush Generously : Don’t skimp on the garlic butter—it’s what makes these bombs extra flavorful and indulgent.
- Serve Immediately : Cheese bombs are best enjoyed warm when the cheese is still gooey and melty.
- Freeze for Later : Assemble the bombs ahead of time, freeze them on a baking sheet, then transfer to a freezer bag. Bake directly from frozen, adding a few extra minutes to the cooking time.
Serving Suggestions
These Garlic Cheese Bombs are incredibly versatile and pair well with a variety of dips and dishes. Here are some ideas to enhance your experience:
- Dipping Sauces : Serve with marinara sauce, ranch dressing, or buffalo sauce for added flavor.
- Party Favorite : Arrange on a platter with toothpicks for easy grabbing at gatherings or potlucks.
- Game Day Snack : Pair with wings, sliders, or nachos for the ultimate game day spread.
- Breakfast Twist : Serve alongside scrambled eggs or breakfast sandwiches for a cheesy morning treat.
- Appetizer Platter : Include them on a charcuterie board with cured meats, olives, and crackers.
Final Thoughts
With their gooey cheese filling, garlicky butter coating, and golden, fluffy exterior, Garlic Cheese Bombs are a snack worth making again and again. Whether you’re hosting a party, craving a cheesy indulgence, or simply looking for a fun and easy recipe, these cheese bombs deliver big on taste and satisfaction.
So, the next time you’re in the mood for something warm, cheesy, and utterly delicious, give these cheese bombs a try. Trust us—they’re quick, easy, and absolutely divine!
Have you tried this recipe yet? Share your thoughts, tips, and variations in the comments below. Happy baking!
Enjoy.